This zucchini lasagna recipe is lightened up with ground turkey, and it’s gluten-free and low carb. It makes a delicious dinner that’s full of protein and bursting with flavor!
Where are my fellow lasagna fans at? This turkey zucchini lasagna recipe lets you ditch the noodles and replace them with zucchini planks! You won’t sacrifice any of the flavor that we all love in the classic casserole but this recipe lightens it up considerably. With enough other flavors, you won’t even know you’re using turkey instead of ground beef either!
I’m not going to try to lie to you, this recipe has multiple steps. If you’re short on time and looking for a meal with less than 30 minutes of prep time, check out these spinach artichoke stuffed portobello mushrooms or this sausage potato skillet.
Buttt, if you’ve got the time, I promise this recipe is worth it! Plus, if you make it on the weekend, it reheats well for quick veggie-filled weekday lunches or dinners.
If you need to/choose to follow a low-carb diet but are still craving comfort food, you’re going to love this. Heck, even if you aren’t, it’s still a winner! It’s gluten-free and Keto friendly so it works for various dietary preferences.
I don’t follow any of those diets but do love that zucchini lasagna allows me to get my veggies in while meeting my comfort food needs. Cause lets face it, this time of year, comfort food is a need, not a want.
How to make zucchini lasagna
As with the classic, zucchini lasagna is all about the layers baby. Since it has to simmer, you start by making the sauce. There are a few quick steps to get rolling:
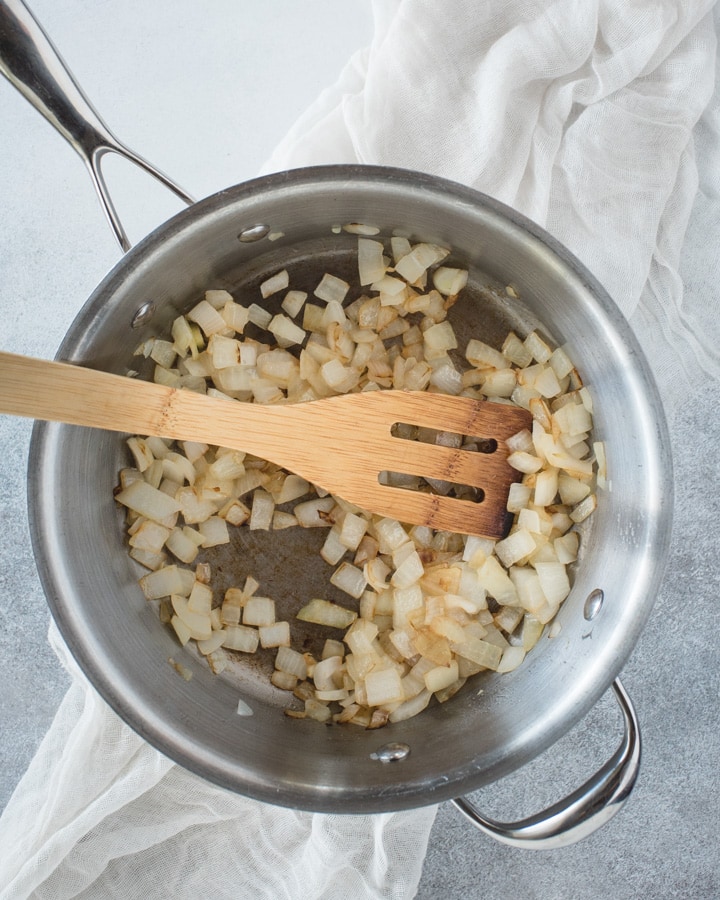
- Sauté the onion in a little bit of oil
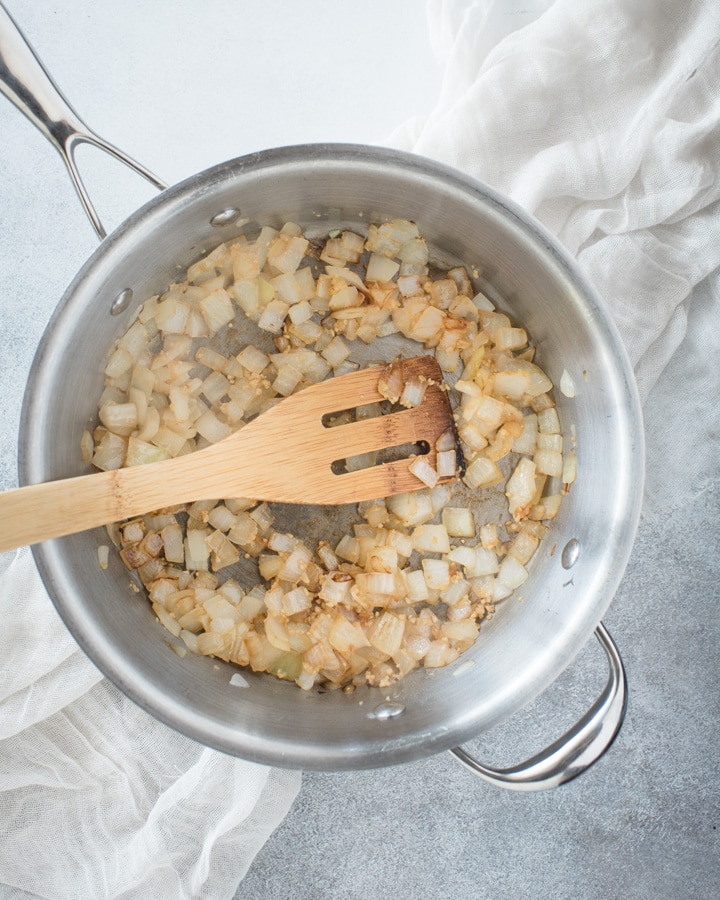
- Add garlic and sauté for another minute.
- Add the ground turkey to the pan. Be sure to break it up into small pieces as it cooks.
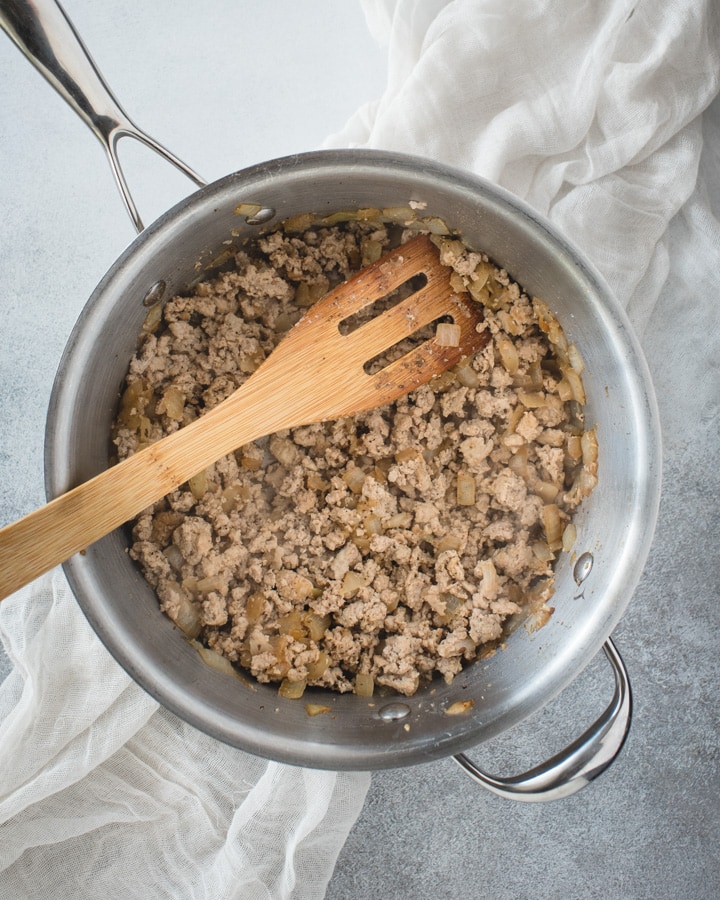
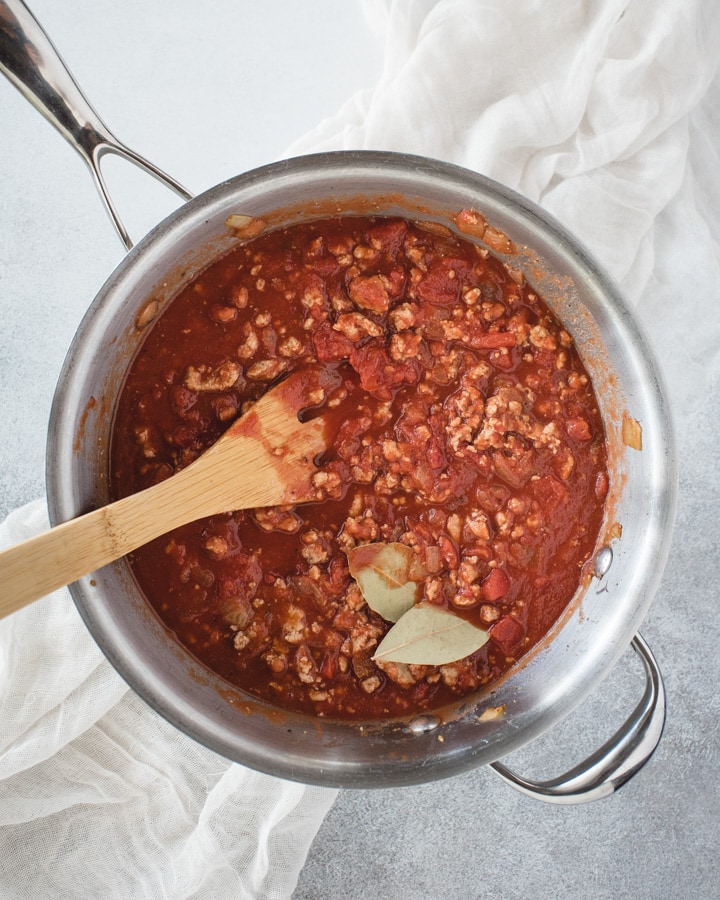
- Stir in the rest of the sauce ingredients to the pot and let them simmer together.
How to make zucchini lasagna noodles
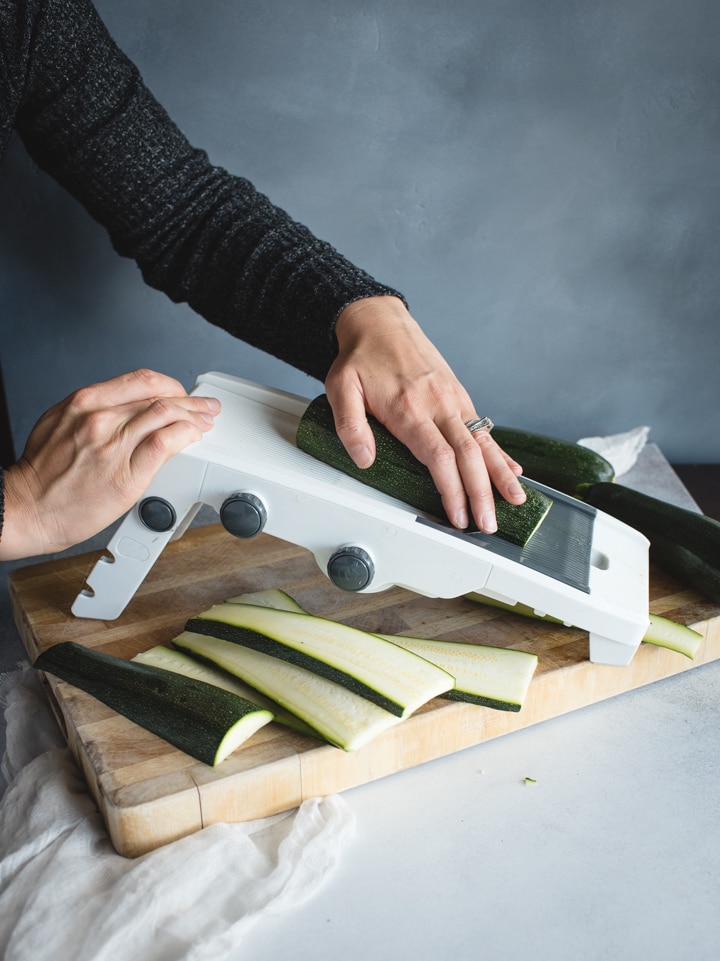
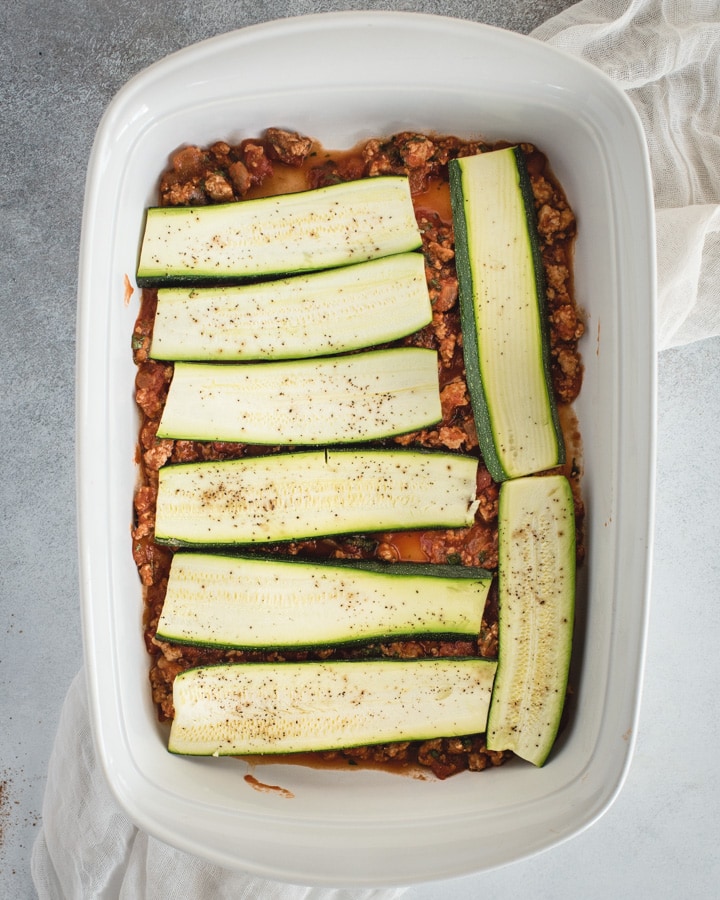
While the sauce is simmering, this is the time to get that zucchini roasting. Use a mandolin slicer to get even, thin layers. Don’t follow my poor example in the picture below and use the guide that comes with the mandolin to avoid slicing your fingers. Trust me, it hurts like a son of a b*tch to cut your finger on a mandolin.
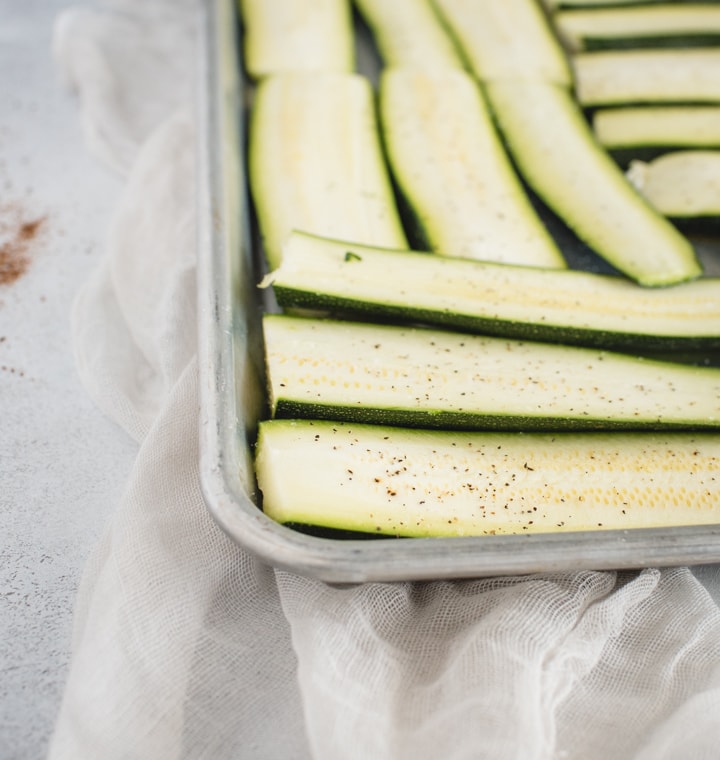
From here, you lay the zucchini out in a single layer on a baking sheet that you’ve sprayed with cooking spray. Mine almost always take up one sheet, but if you have extra zucchini layers, you can either pull another sheet out or do a second batch.
Sprinkle those zucchini slices with a bit of salt and pepper and then let them roast.
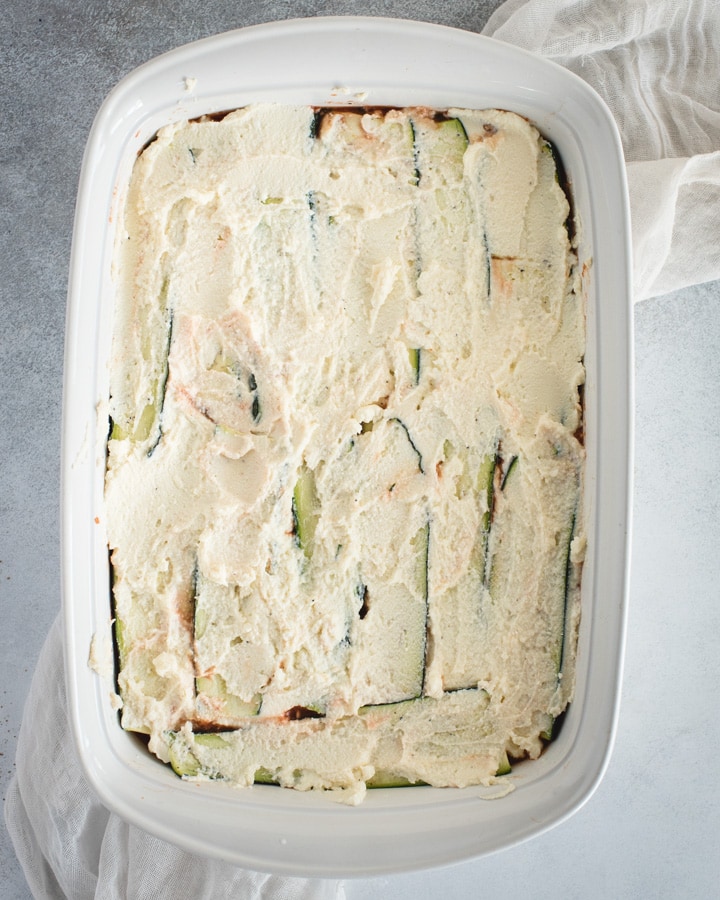
While the zucchini is roasting, you can go ahead and mix the ricotta, egg, parmesan, and nutmeg so that it’s ready for layering. This combo is the exact same one I use in when making regular lasagna with noodles.
The egg and ricotta make that cheesy layer that makes lasagna so to die for. The nutmeg is barely detectable and can be left out but adds a nice hint of flavor.

Assembling the lasagna
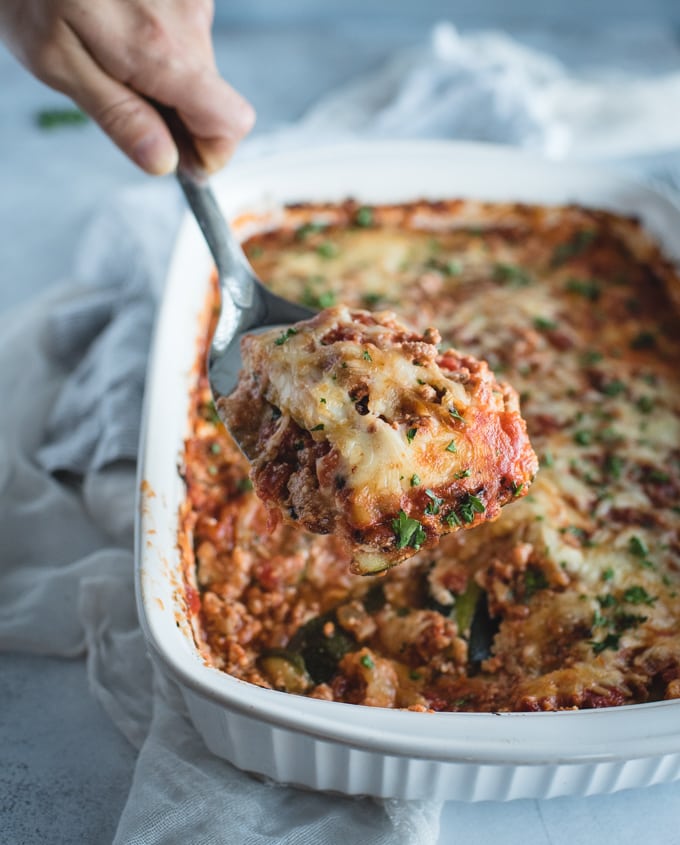
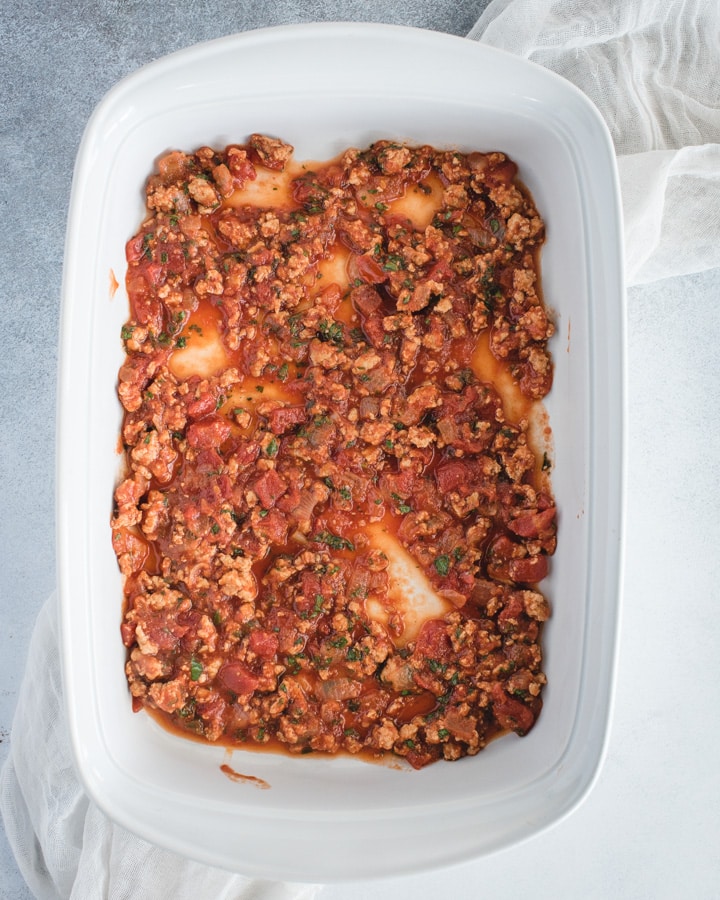
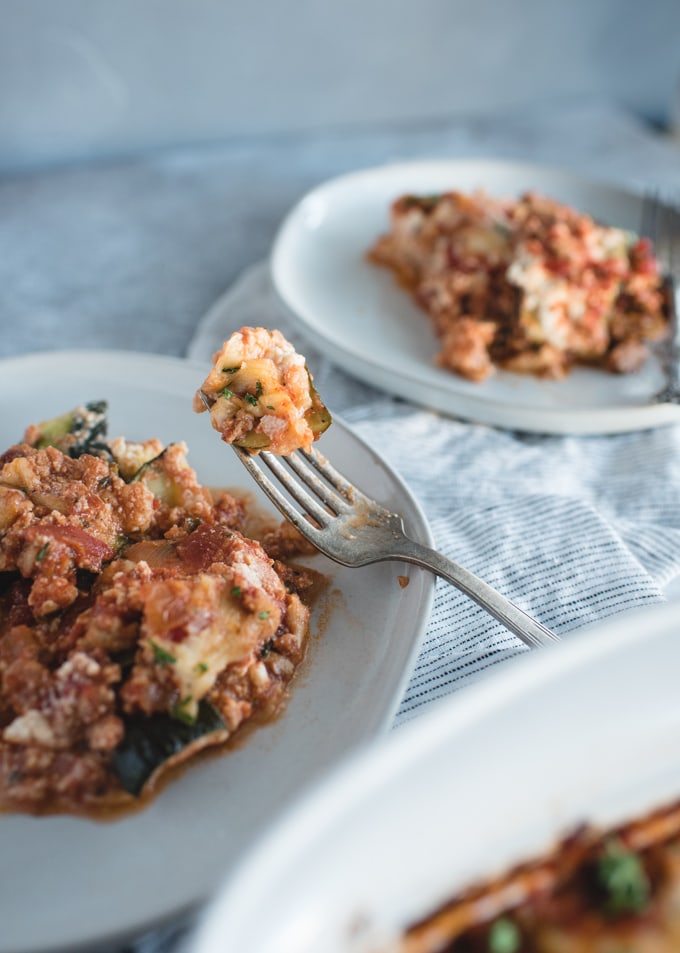
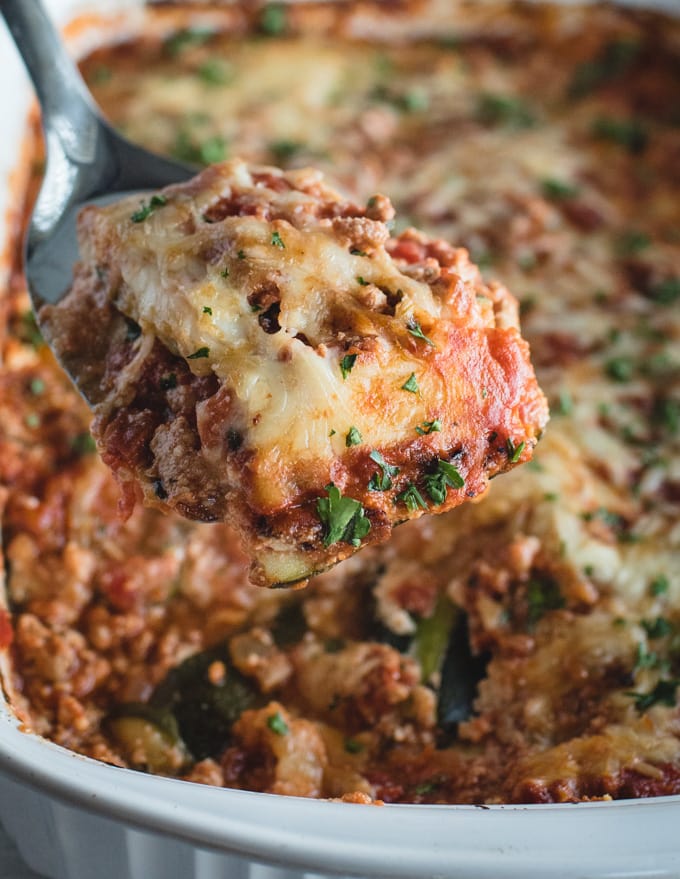
Then when the zucchini is roasted and the meat sauce is done simmering, it’s time for some layering. In this recipe, the way you layer really matters. I start with a layer of sauce to keep everything else from sticking.
From here, make your first zucchini layer. Not to worry, your zucchini layer can be patchy like mine. 😉
Then, you rub that zucchini down with the ricotta mixture. It can be hard to spread so I normally just plop a few globs down in a few spots and then spread as best as I can.
Then a cheese layer because cheese is essential in zucchini lasagna (or any lasagna recipe really).
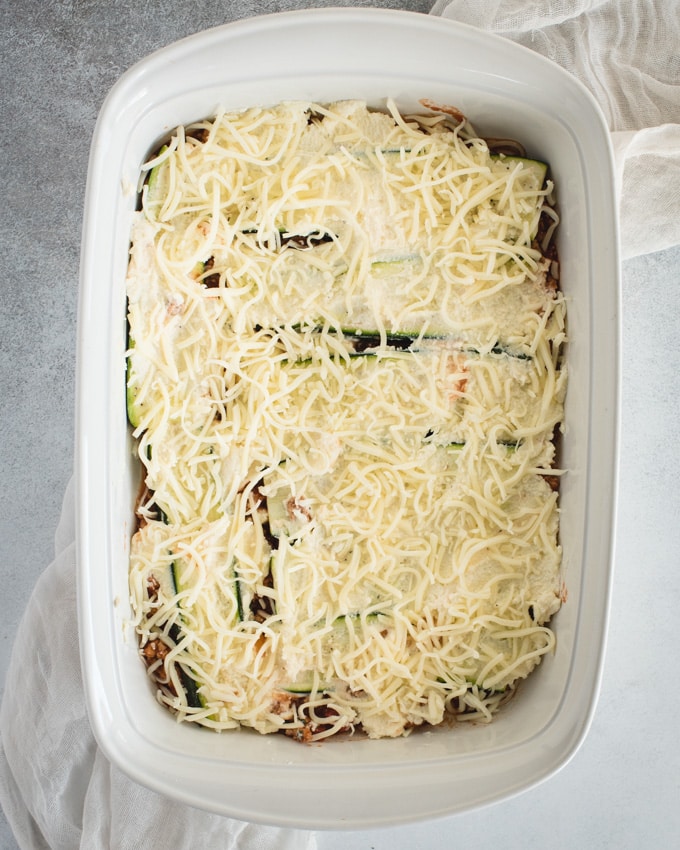
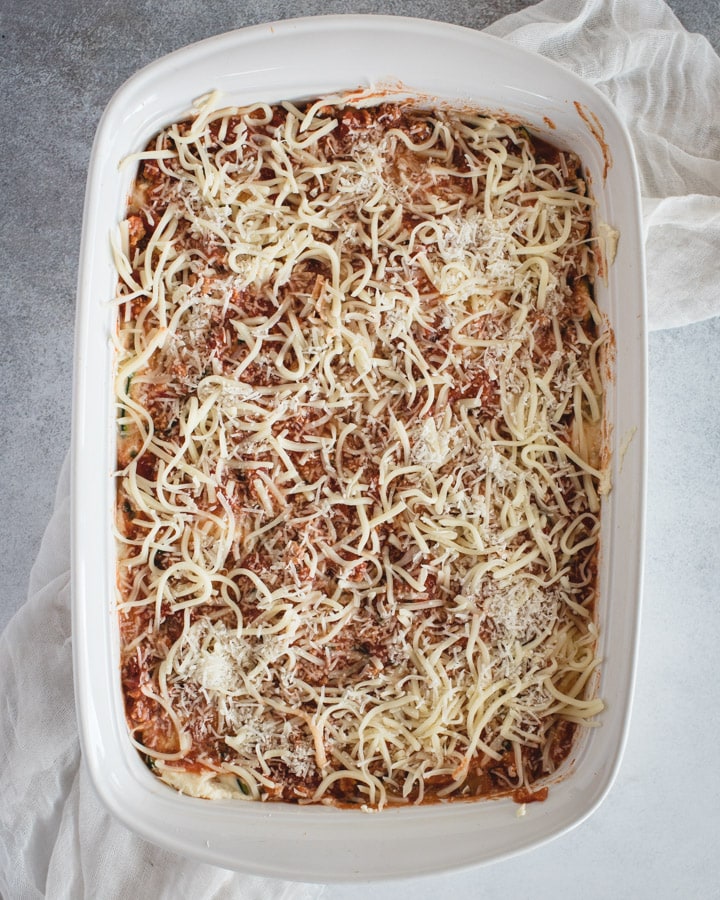
You’ll repeat all layers once and then your very last top layer is just going to be sauce and cheese. Trust me on this, you want a little more sauce and cheese in the mix.
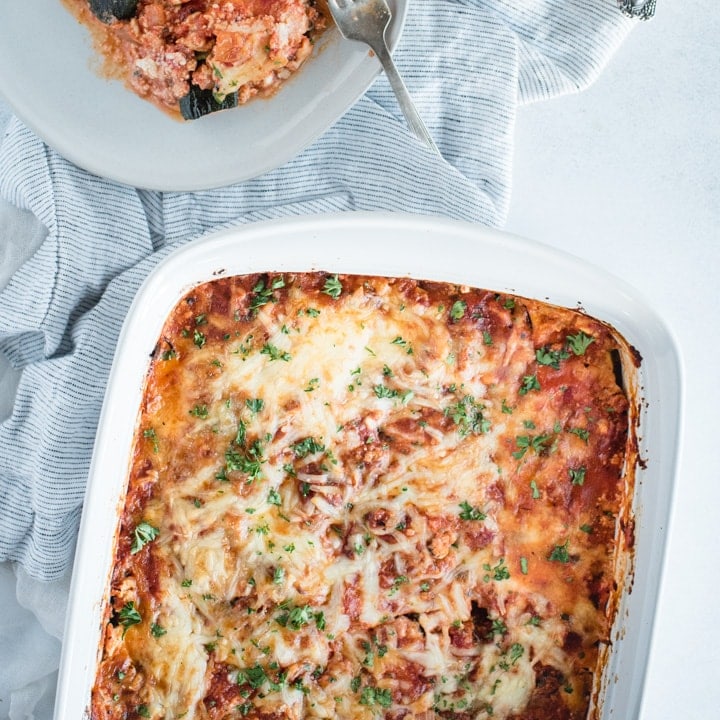
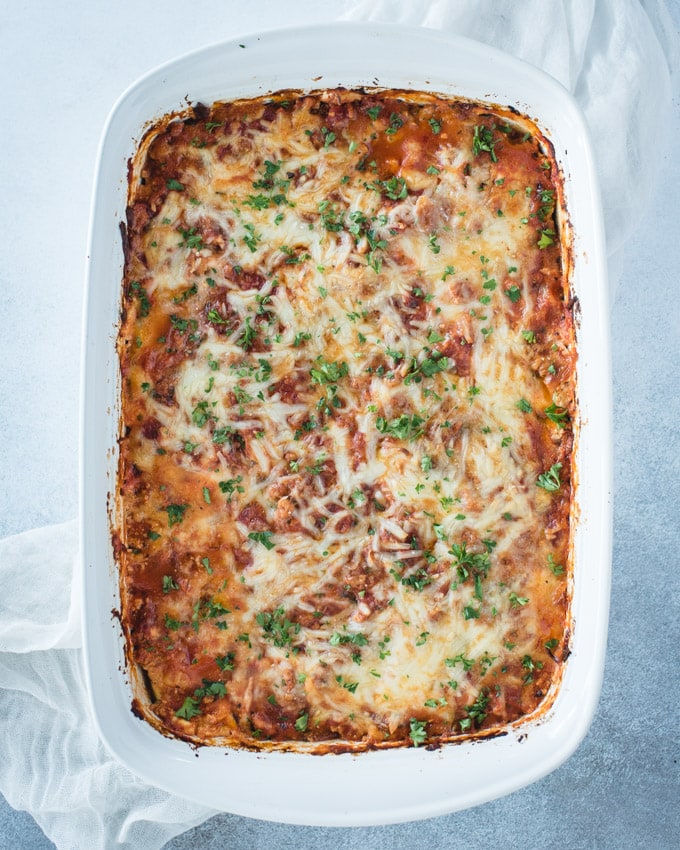
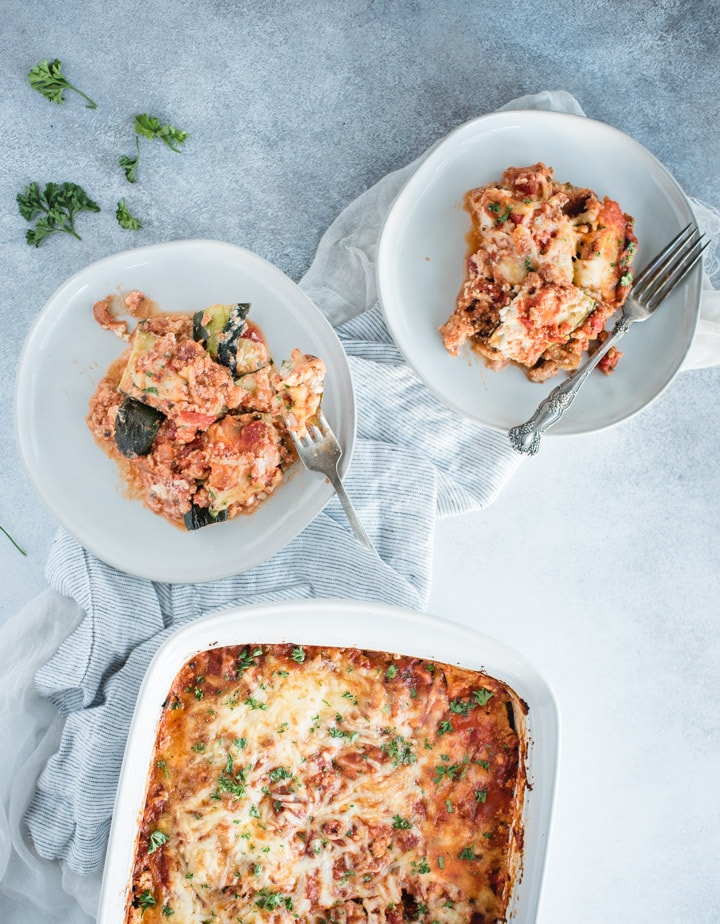
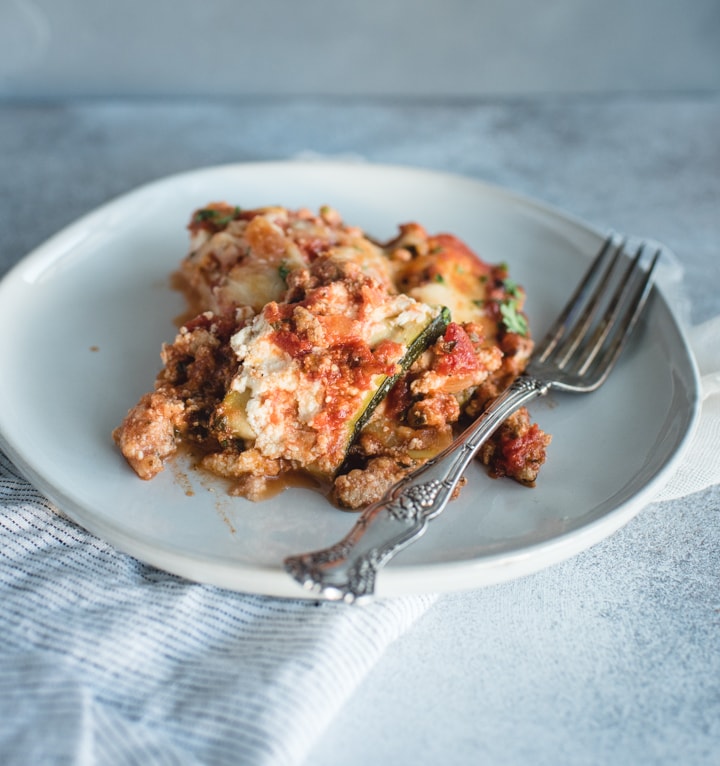
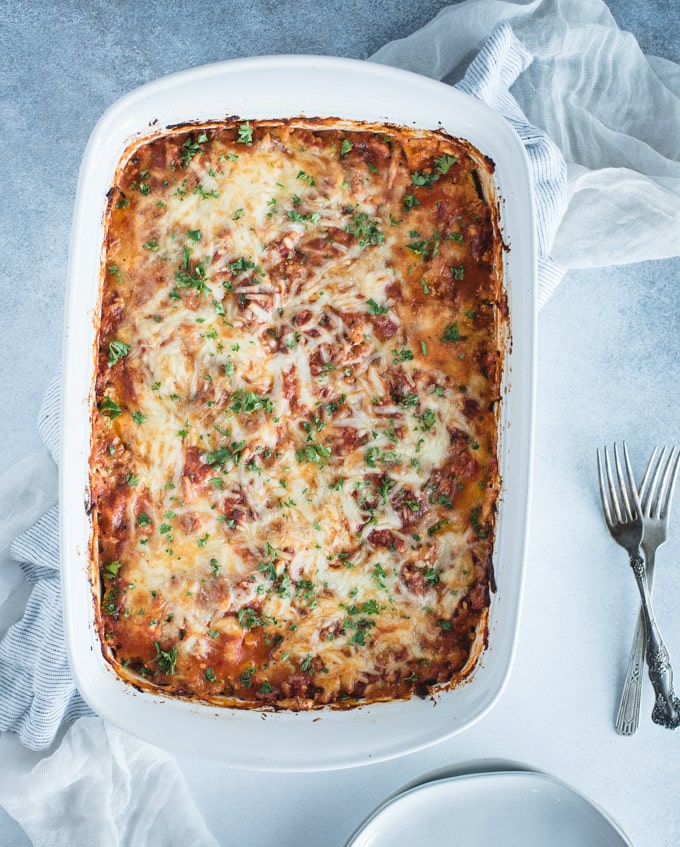
Bake your zucchini lasagna in a preheated oven for 30 minutes and voila! You’ve got yourself an incredible meal!
I like to sprinkle parsley on top but if you don’t want to have to buy another herb and have fresh basil already, you can definitely use a bit of that instead. Or, you can skip it altogether of course. It’s really just there for a pop of color.
Tips for making the best zucchini lasagna
Although turkey zucchini lasagna is a pretty straight forward recipe, there are definitely some steps that’ll guarantee success.
- Use zucchini that are 1-2 inches in diameter. I tried using big fresh garden zucchini once and it was just too watery and the seeds got caught in the mandolin. If you are using big garden zucchini, you might want to sweat the zucchini slices before baking. To do this, sprinkle with salt, let sit for 20-30 minutes and then rinse and pat dry.
- Use a mandolin slicer! It’s really hard to cut the zucchini the right thickness without one.
- If your zucchini looks watery after baking at all, pat it dry with clean kitchen towels or paper towels before using in the lasagna. This is a must for watery zucchini slices.
- Let your sauce simmer the full 30 minutes. Don’t skimp on this or it won’t have as much flavor!
Making zucchini lasagna ahead of time
By making the recipe ahead of time, I mean doing the prep early, refrigerating, and then doing the final bake later, right before eating. I do this all of the time with regular lasagna, but with zucchini lasagna, it is harder.
The zucchini will continue to release water unlike noodles that absorb water. This means that you’ll need to get as much of the water out as possible or end up with a watery end product.
If you do decide to prep your zucchini lasagna ahead of time, make sure to bake it within 24 hours at the absolute most. Also, you’ll need to get as much water out of those zucchini slices as possible so definitely use paper towels or a kitchen towel to blot all extra moisture out of the cooked zucchini slices.
Even if you do everything right, when making ahead of time it will most likely be a bit more watery. The good news is that the extra water can just be left at the bottom of the casserole dish and won’t affect the flavor one bit.
Storing, freezing and reheating
There are two different ways to freeze and store your zucchini lasagna: cooked or uncooked.
If it is fully cooked and you just have more than you can eat, I recommend storing individual portions in plastic airtight containers. When you pull a serving out to eat it, microwave for 30-60 seconds, then cut the serving into four pieces to make sure the middle gets warmed as well. Microwave on high for another minute or until fully heated.
The other option is to freeze the whole prepared casserole before doing the final 30 minute bake. This allows you to have a full meal on hand that is ready to bake for a busy weeknight meal, but the trade-off is that the zucchini lasagna will be a lot more watery when you finally do go to bake it and won’t have as much texture and crunch from the zucchini.
If you’re okay with this, make sure to use the oven-safe baking container that you want to freeze the casserole in, then seal the top liberally with plastic. Let the casserole freeze laying flat and then keep frozen for up to 3 months.
Pull it out of the oven the night before you want to bake it and allow it to defrost in the refrigerator that night and the following day. Bake for 30-40 minutes prior to serving.
Other recipes you’ll love
If you’re looking for other dinner recipes, here are some suggestions:
- Eggplant lasagna roll ups – one of my favorite recipes to make!
- Quick and easy Mexican quinoa casserole
- Fall favorite brown rice risotto with butternut squash and mushrooms
- Creamy chicken stroganoff
- Easy chicken potato bake
Or, if you have more zucchini to use up and need a few zucchini filled recipes, here are a few ideas:
- This chocolate zucchini bread (we always demolish it in a day or less so be warned, it’s addicting!)
- My grilled zucchini with feta, basil, and balsamic glaze
- Our favorite zucchini pizza bites – perfect for game day!
- Zucchini fritters with yogurt dill dipping sauce
- Zucchini, tomato dip – I promise it tastes better than it looks
Zucchini Lasagna
Equipment
- mandolin slicer
Ingredients
- 1/2 Tbsp. avocado oil (or whatever oil you prefer)
- 1 medium onion, chopped
- 2 tsp minced garlic
- 1 lb. lean ground turkey
- 1 1/2 tsp. salt (plus extra for zucchini slices)
- 1/2 tsp. pepper (plus extra for zucchini slices)
- 1/2 tsp. dried oregano
- 1 1/2 tsp. dried basil, divided (or 2 Tbsp. fresh basil)
- 28 ounces crushed tomatoes (1 can)
- 8 ounces tomato sauce
- 2 bay leaves
- cooking spray (or additional oil for zucchini)
- 2 1/2 lbs. zucchini (4-5 medium sized zucchini)
- 15 ounces part-skim ricotta
- 1 egg
- 1/8 tsp. nutmeg
- 1/3 cup grated parmesan, divided
- 2 cups shredded part-skim mozzarella
- 1 Tbsp. chopped parsley (optional, or can sprinkle with extra fresh basil instead)
Instructions
- Heat oven to 400° F (205° C).
- Heat oil in a large pan over medium heat. Add onion and sauté for 4-5 minutes to soften. Add garlic and cook a minute longer.
- Add ground turkey and cook, breaking into small pieces with a wooden spoon while cooking.
- Season turkey with salt, pepper, oregano, and half of the basil (if using fresh basil, wait and add during last 10 minutes of sauce simmer time).
- Pour crushed tomatoes and tomato sauce into turkey, add bay leaf, and bring to a low simmer. Reduce heat and simmer for 30 minutes, stirring occasionally.
- While sauce is simmering, cut ends off of each zucchini and use a mandolin slicer to slice zucchini into 1/8" thick slices.
- Spray a baking sheet with cooking spray. Lay zucchini slices out in a single layer. Spray top side lightly with cooking spray and season lightly with salt and pepper. Place baking sheet in oven and roast for 15-20 minutes. When removing from oven, dab zucchini slices with a paper towel or clean kitchen towel if they appear watery.
- While sauce simmers and zucchini bakes, mix ricotta, egg, half of parmesan, and nutmeg in a small bowl.
- When sauce and zucchini slices are ready, remove bay leaves from sauce and ladle 1/3 of the sauce into the bottom of a 9×11" baking dish. Add layer of zucchini on top of sauce. Spread 1/2 of the ricotta mixture on top of zucchini slices. Sprinkle with 1/2 cup of mozzarella.
- Repeat next layer with half of the remaining sauce, remaining ricotta, zucchini, and 1/2 cup of mozzarella. Top with remaining sauce, then mozzarella and parmesan.
- Bake for 30 minutes until sauce is bubbling and cheese is melted. Let stand for about 10 minutes before serving.
Notes
Nutrition
did you make this recipe?
Make sure to follow on Pinterest @feastingnotfasting and on Instagram @feastingnotfasting


Leave a Review